The Squier Vintage Modern Jaguar Short Scale Bass
The Jaguar SS has become something of a legend among bass players, as a stand-out budget instrument even at a time when affordable instruments are of increasingly good quality. Some people go as far as saying these basses are responsible for the new popularity of short scale basses across the board.
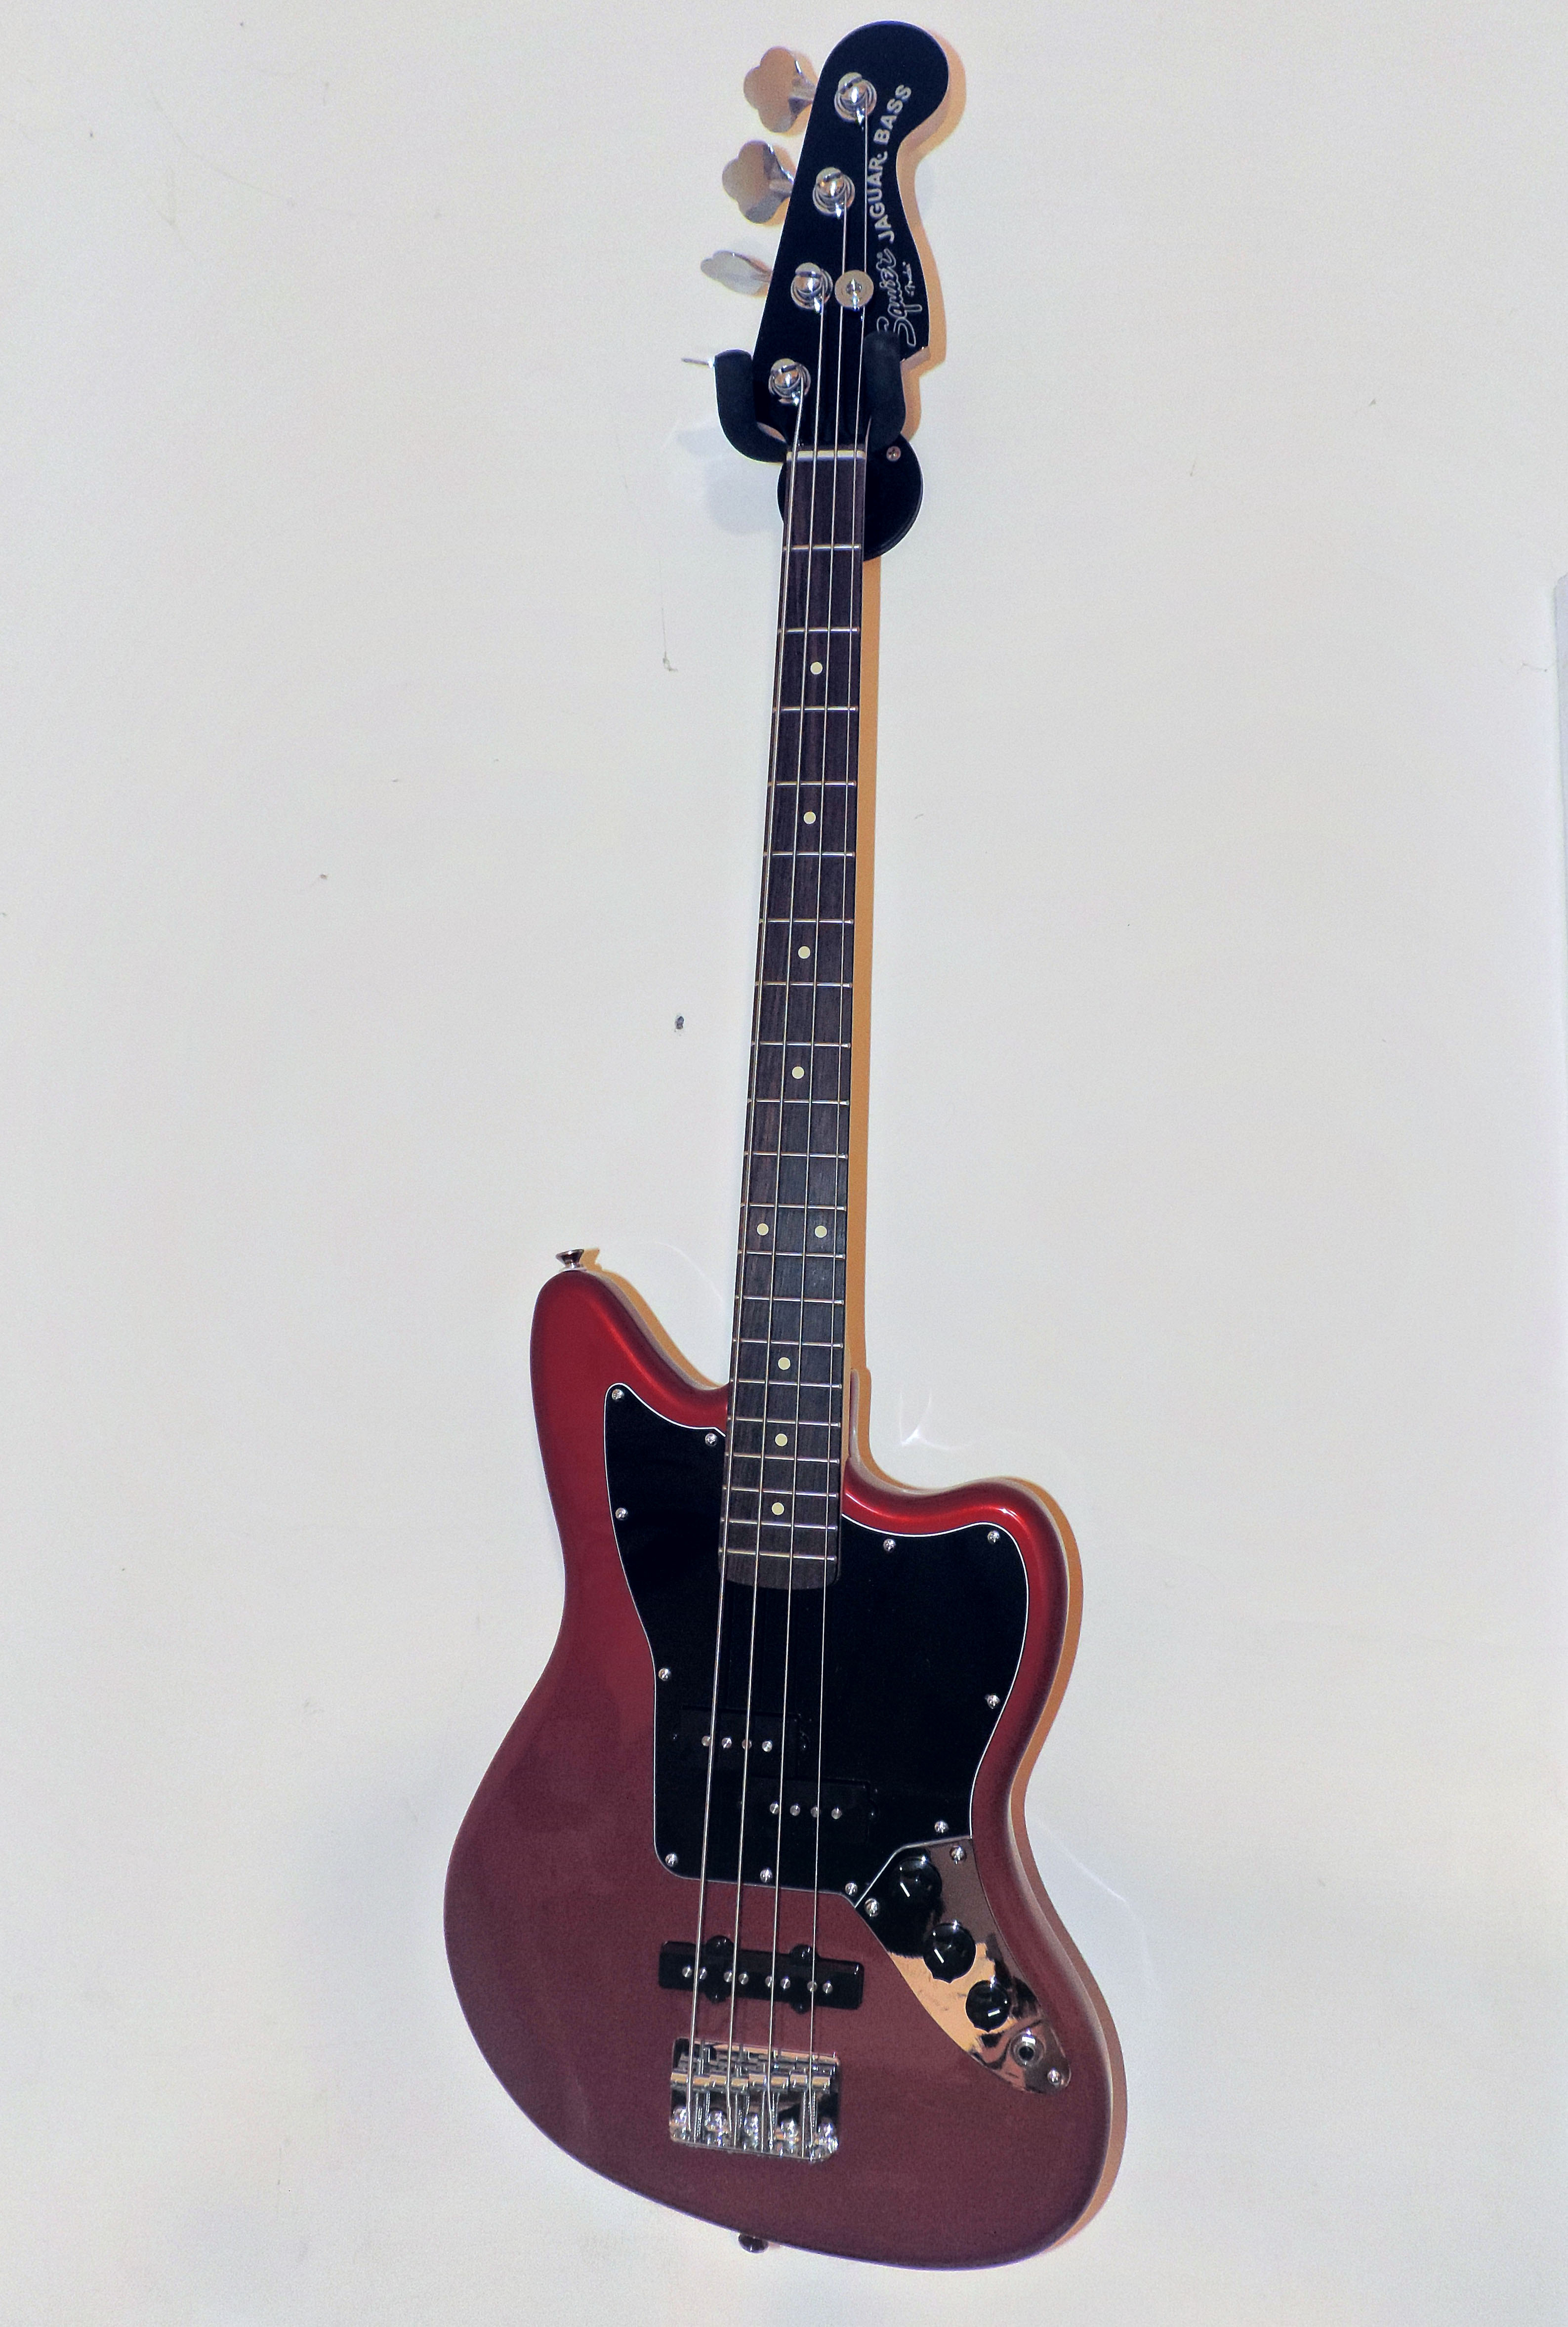
Despite being produced under Fender's budget brand of Squier in South Korea, these basses are well known for their extraordinary playability combined with great looks. Part of this is, no doubt, down to the fact they are made by for Fender by Cort whose workmanship and quality standards are very high. For an RRP around £200 (as of 2019) you get a ridiculously good instrument for your money. The Jaguar is also stunningly beautiful (in my humble opinion) being based on the Jaguar guitar, which is rather chunkier than the Precision and Jazz bass shapes.
The bass is a short scale instrument - don't believe the guff that this means it is for students, guitarists and people of small stature! Some thirty years ago I played a short-scale Fender Mustang bass and it was one of the most fun instruments I ever handled, and that's why I tried out the Jag SS - I instantly discovered how comfortable it is to play and how it flatters your abilities! I'm 6' 2" with long fingers and have several 24-fret full scale length basses, so I don't struggle with a long scale, but I find the short scale bass is much harder to put down. Partly this is due to lower string tension, which makes playing less tiring and gives a deep, warm tone.
Obviously some corners have to be cut to keep down the price, beyond simply outsourcing manufacture. In the case of the Jaguar SS, this is partly achieved by leaving out the additional control plates and active circuitry of the higher end Jaguar basses. But you still get things like a lovely fast neck and rolled fingerboard edges which give the bass its playability.
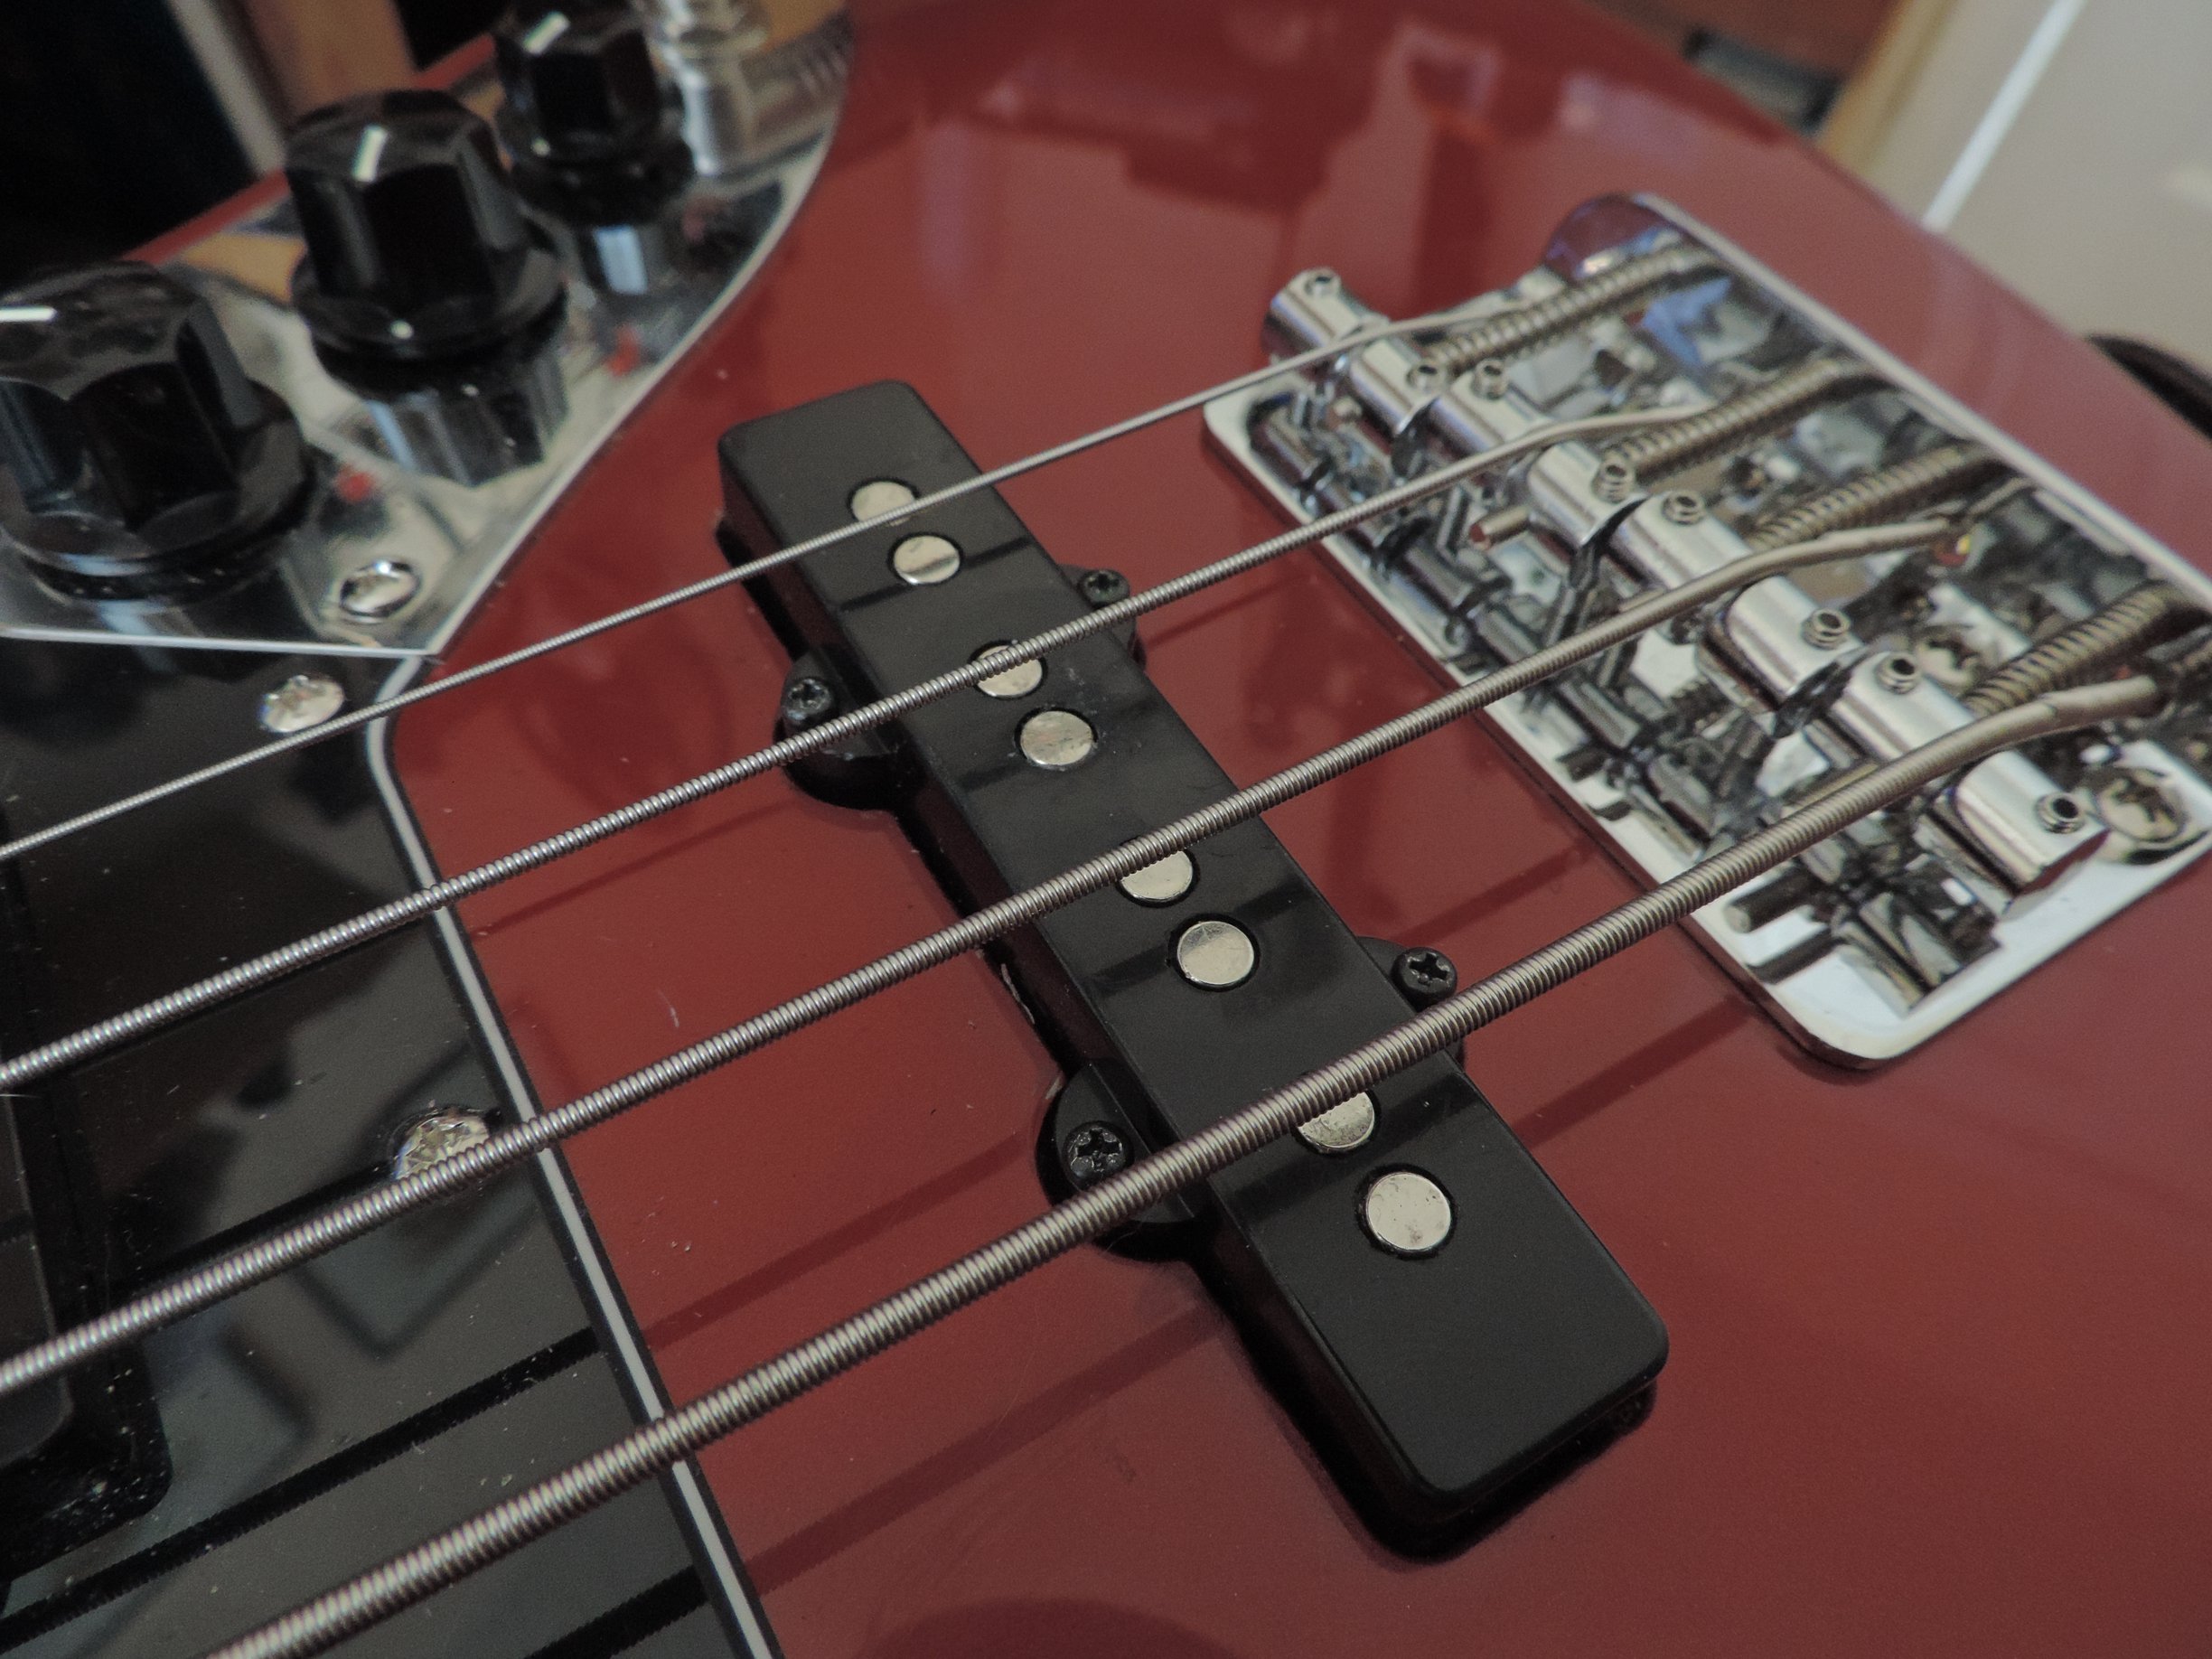
There is one widely recognised weakness, though. The split P-bass pickup has a great driving tone that can give you a good taste of real Precision bass rumble. In contrast, the bridge J-bass pickup has a low output and a distinct lack of 'bite' or 'honk'. Many owners replace this pickup with an after market one, say by Jim Dunlop or Di Marzio, but this could add 40-50% to the price of the bass. There is a cheap alternative that works very well.
Supercharging the Jaguar SS Bridge Pickup
First, go on eBay and obtain some 5mm diameter by 3mm thick neodymium magnets, you will need eight of these.
Unplug the bass and loosen off the strings - you don't need to remove them - and unscrew the four pickup screws. With a little effort you should be able to pull out the pickup. Leaving it wired to the instrument, peel off the backing foam that holds the two springs in place and put to one side. You should see two ceramic magnets either side of the pole pieces.
For the 'level one' supercharge you need to use a scalpel to clean away the wax from the ends of the pole pieces. Your new magnets will probably all be stuck together as a lone stack. Carefully wave the end of the magnet stack over the bottom of the pole pieces. One way round you will feel repulsion, the other attraction. Once you can feel the magnets being attracted into the pole pieces you know which way around they need to be fitted. Simply slide them one at a time from the end of the stack and sit one on the bottom of each pole piece. Secure in place with a drop of superglue. Reattach the foam and springs, refit the pickup and tune up. You should notice the pickup now has much more 'middle' and punches through rather better.
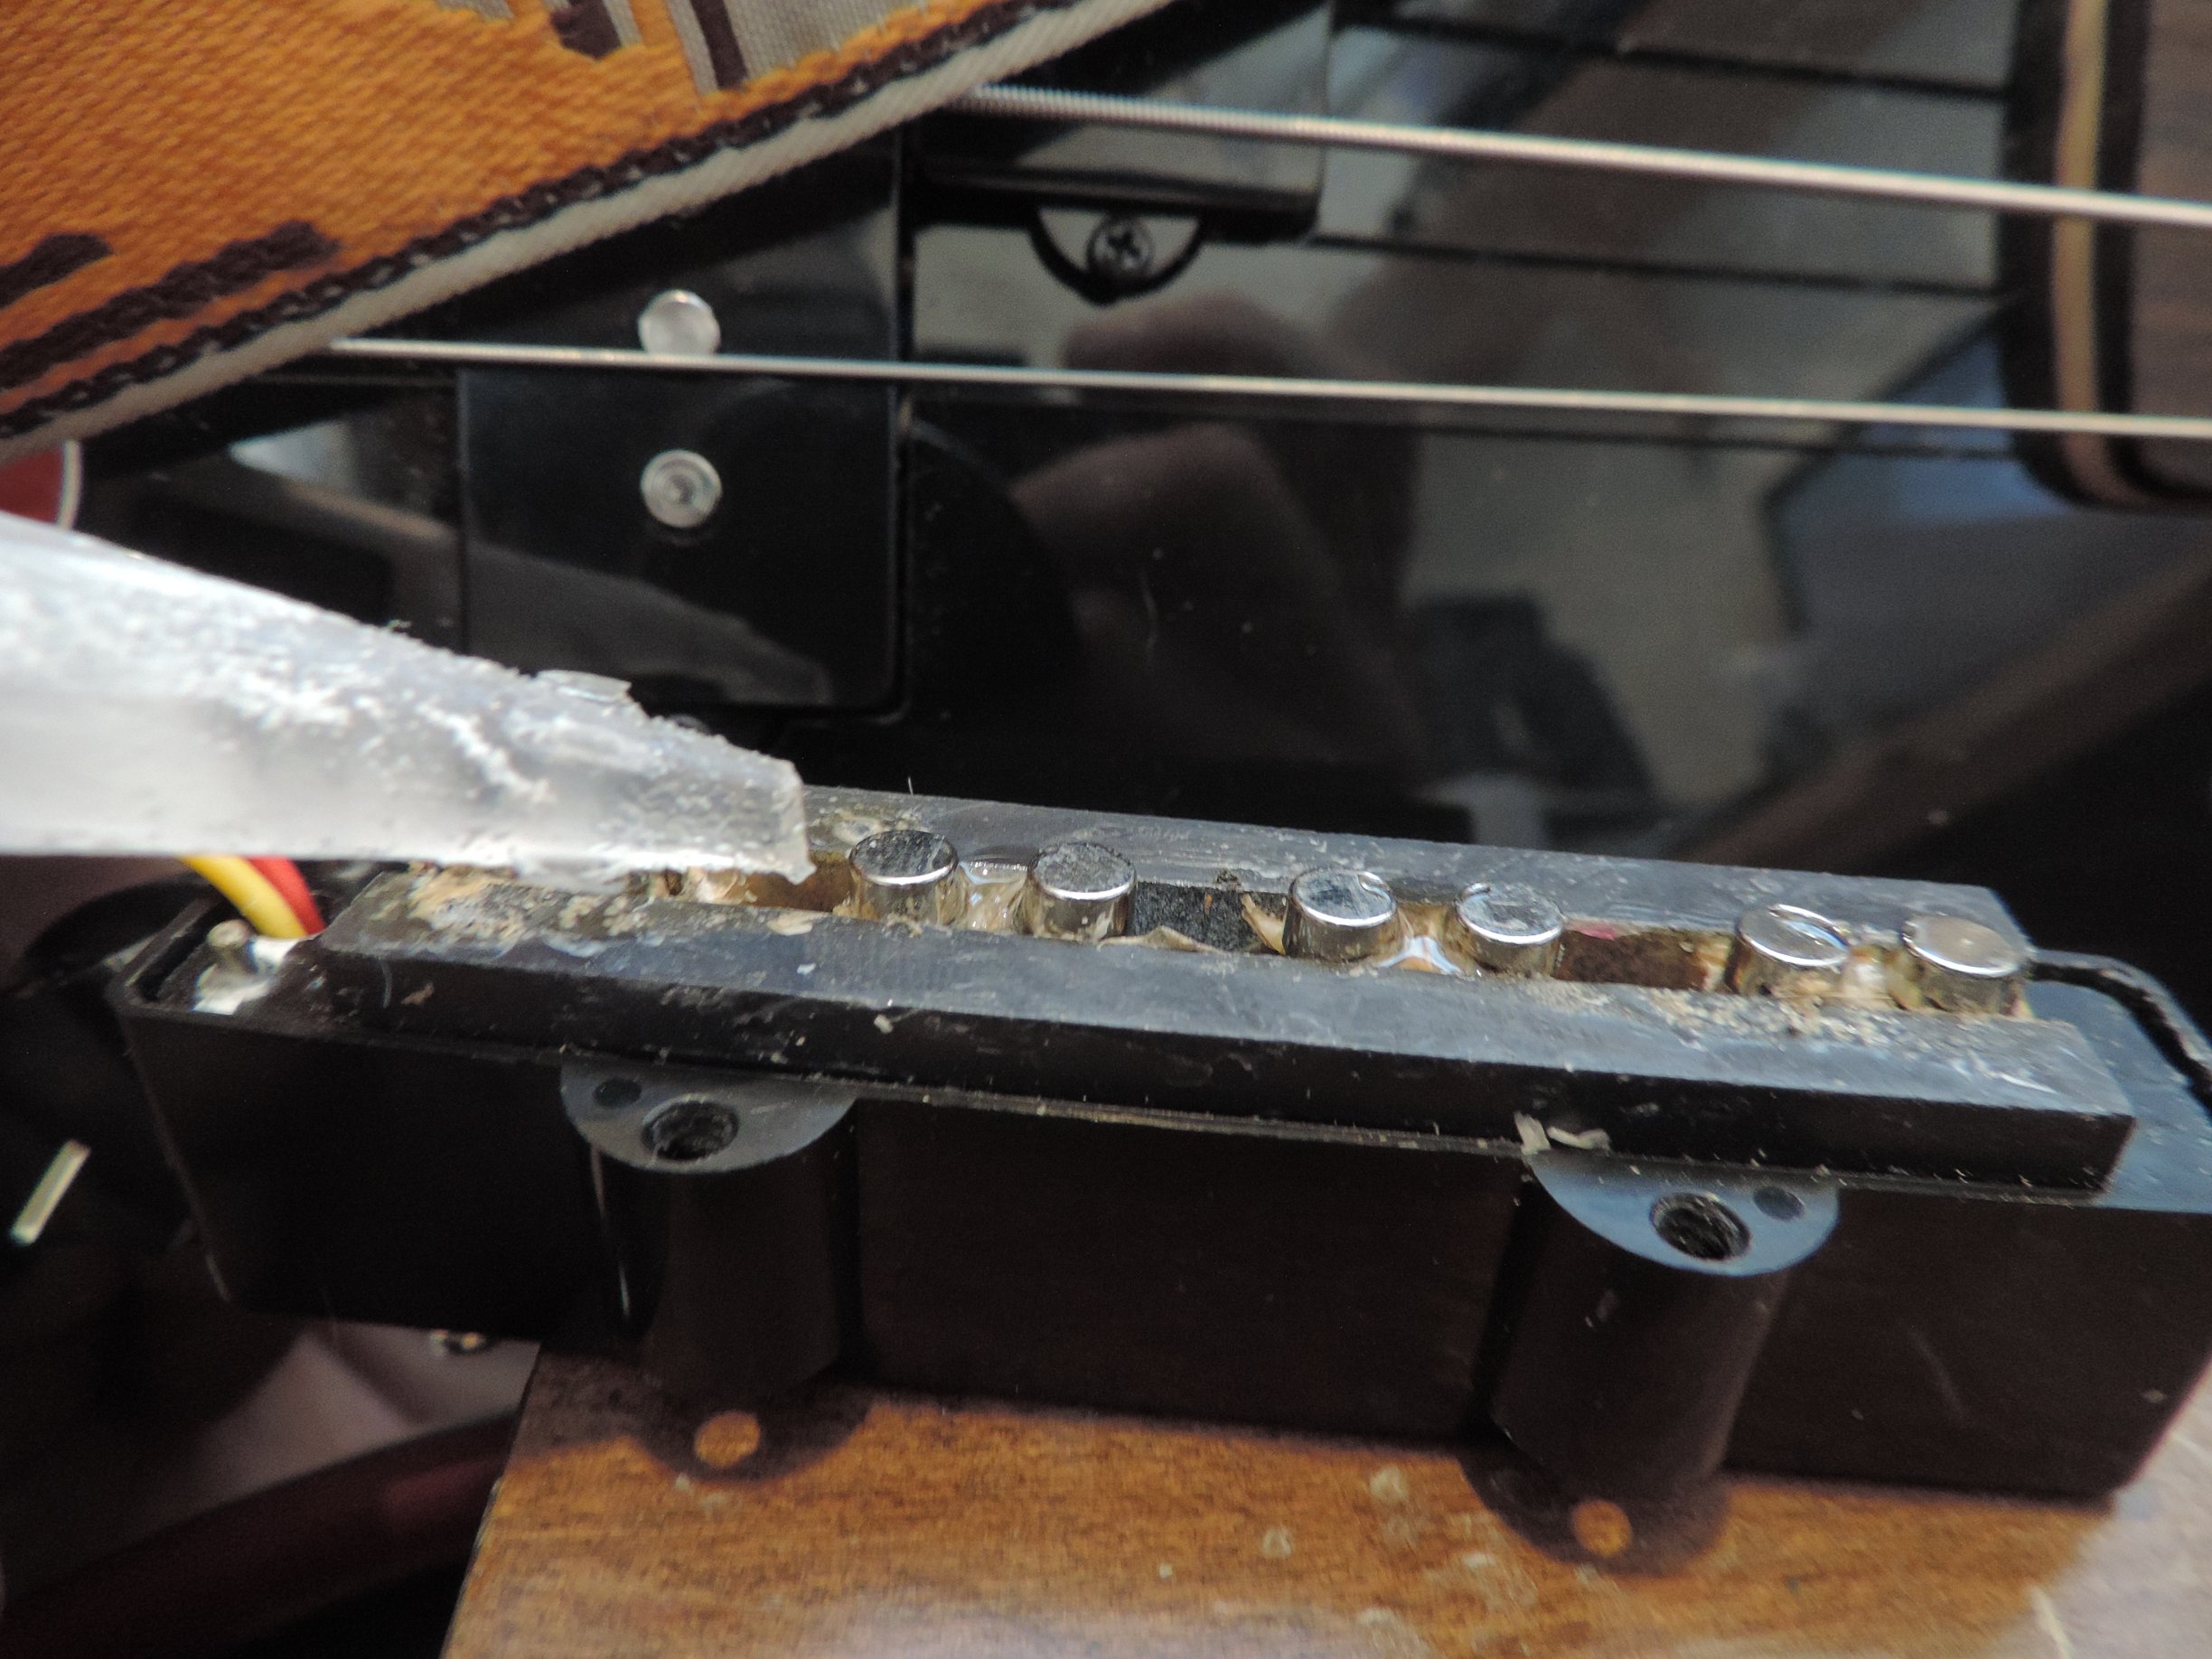
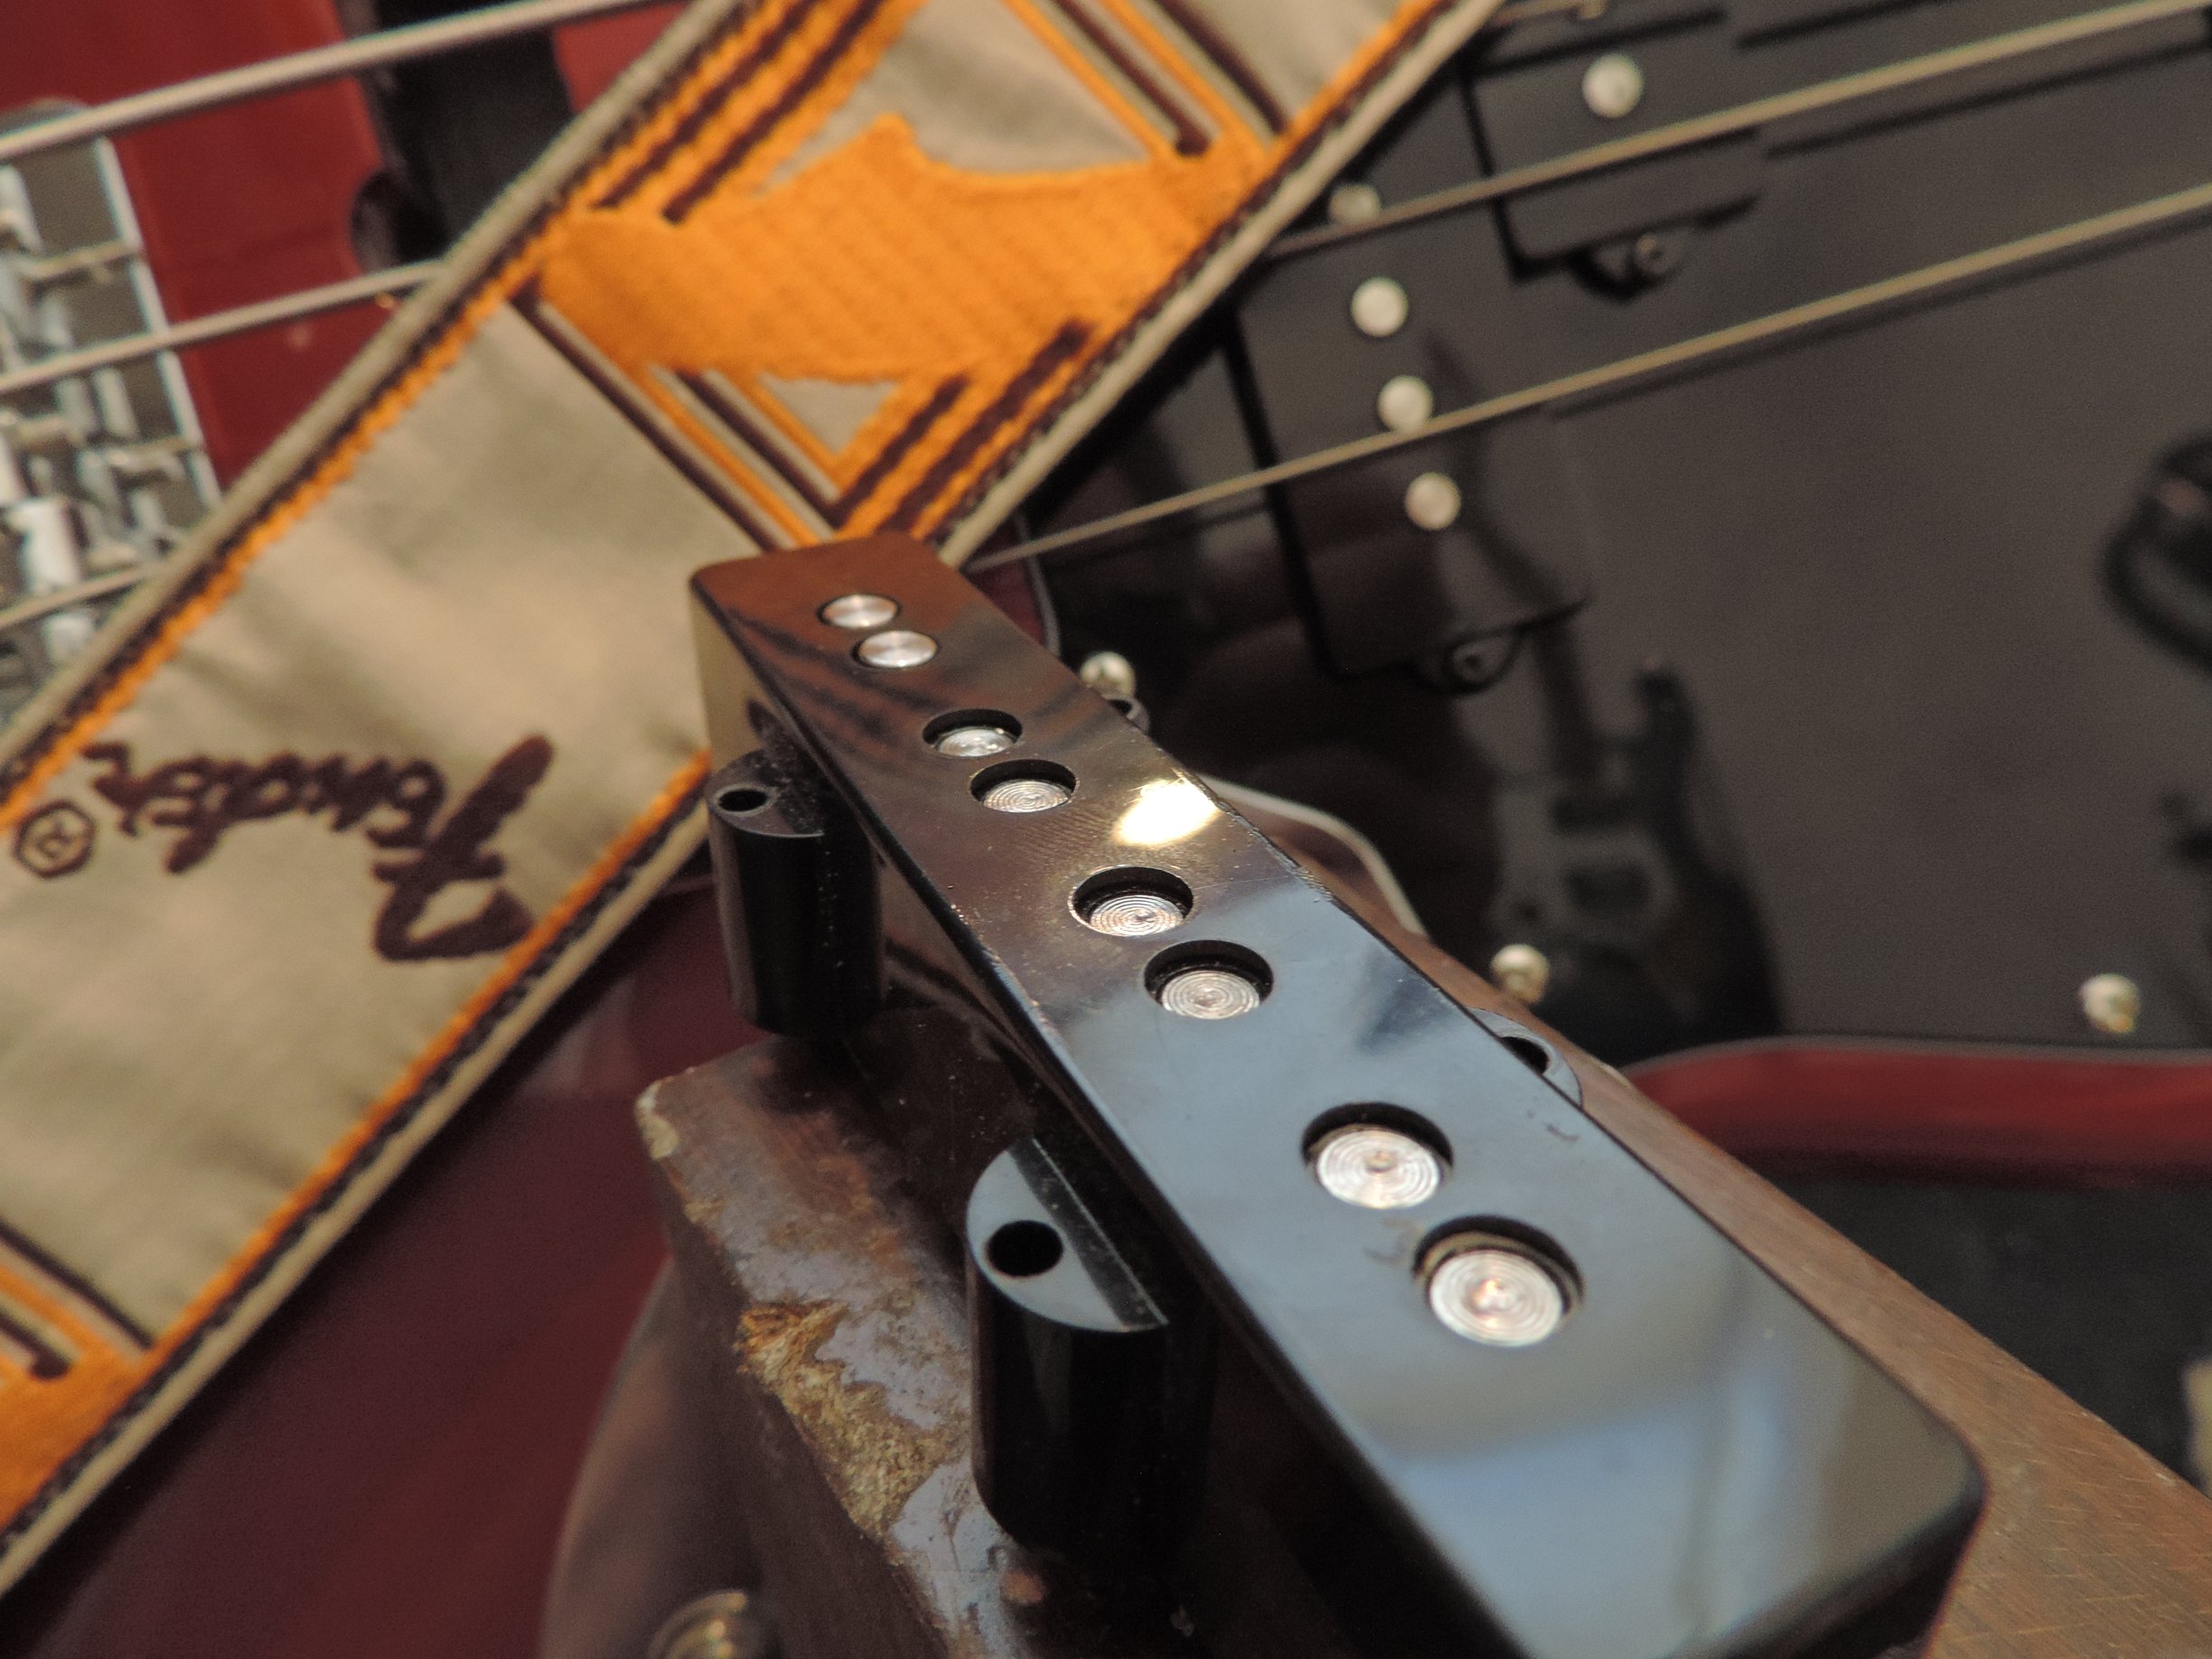
You are likely to find it is still quite a bit less powerful than the P-bass pickup, even when set nearer to the strings. If you want super output from the pickup you can do the 'stage 2' mod instead. For this you need a block of wood to support the pickup from below while you use a small hammer and a blunt screwdriver or punch to gently tap the pole pieces down below the front surface of the pickup by about 4mm. Use the same technique to get the magnets the right way around, but this time the surface of the magnets repelled by the bottom of the pole pieces is the right one to have down as you fit them in the holes in the pickup cover. Once you have all eight in place, turn the pickup over face down on your wooden block. Gently tap the bottoms of the pole pieces until the magnets are flush with the front of the pickup cover. Because the cover helps locate the magnets you should not need any glue, unless any of the pole pieces have become loose.
After refitting the stage 2 modded pickup you should find you can get a nice funky tone which is much closer in output to the neck pickup, also turning both pickups full up should give a rich, rounded tone. Finally you can use the bridge pickup with the tone backed off for more nasal 'honk' and less harsh sound.
If you find that with the two pickups turned full up the sound become very weak and trebley, then you have fitted the magnets upside down - the solution is obvious!
You can spot a stage two modified pickup because its pole pieces are smooth rather than having a spiral pattern on the end.
Send it!